Enhancing Accessibility and Comfort with Roll-in Showers
When considering a bathroom renovation or upgrade, one of the key features you might think about is the shower. Specifically, a roll-in shower offers unparalleled convenience and safety, making it an excellent choice for individuals with mobility issues or for anyone who values a more accessible, barrier-free bathroom environment.
What is a Roll-in Shower?
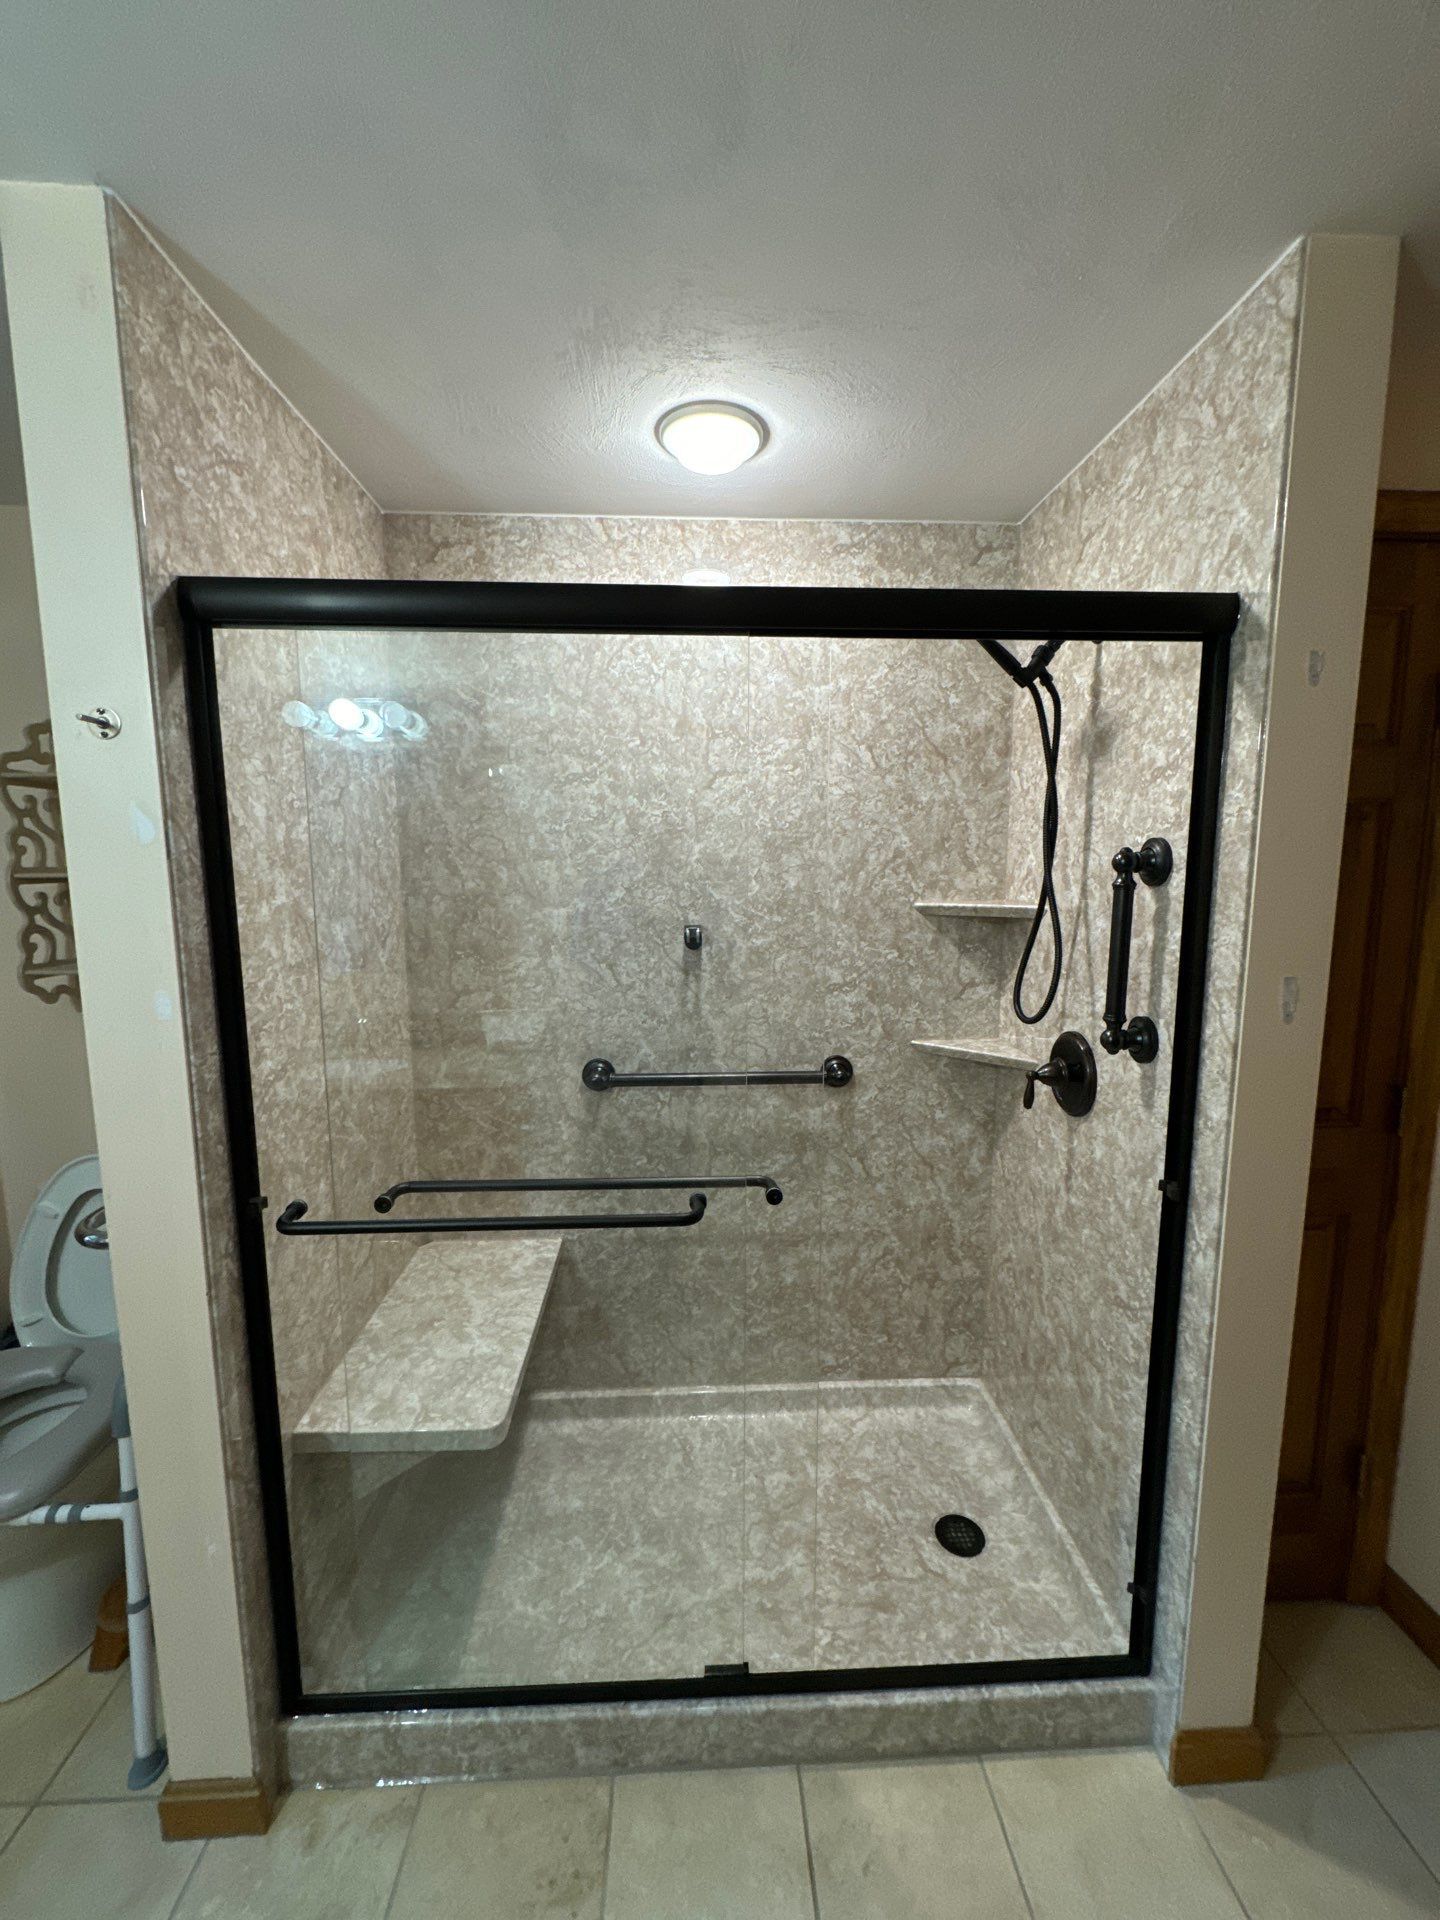
A roll-in shower, also known as a wheelchair-accessible shower, is designed to allow easy access, typically featuring a zero-threshold entry, wide doors, and ample space to accommodate a wheelchair. These showers are not only practical but also come with various customization options to fit any bathroom style and size.
Benefits of Installing a Roll-in Shower
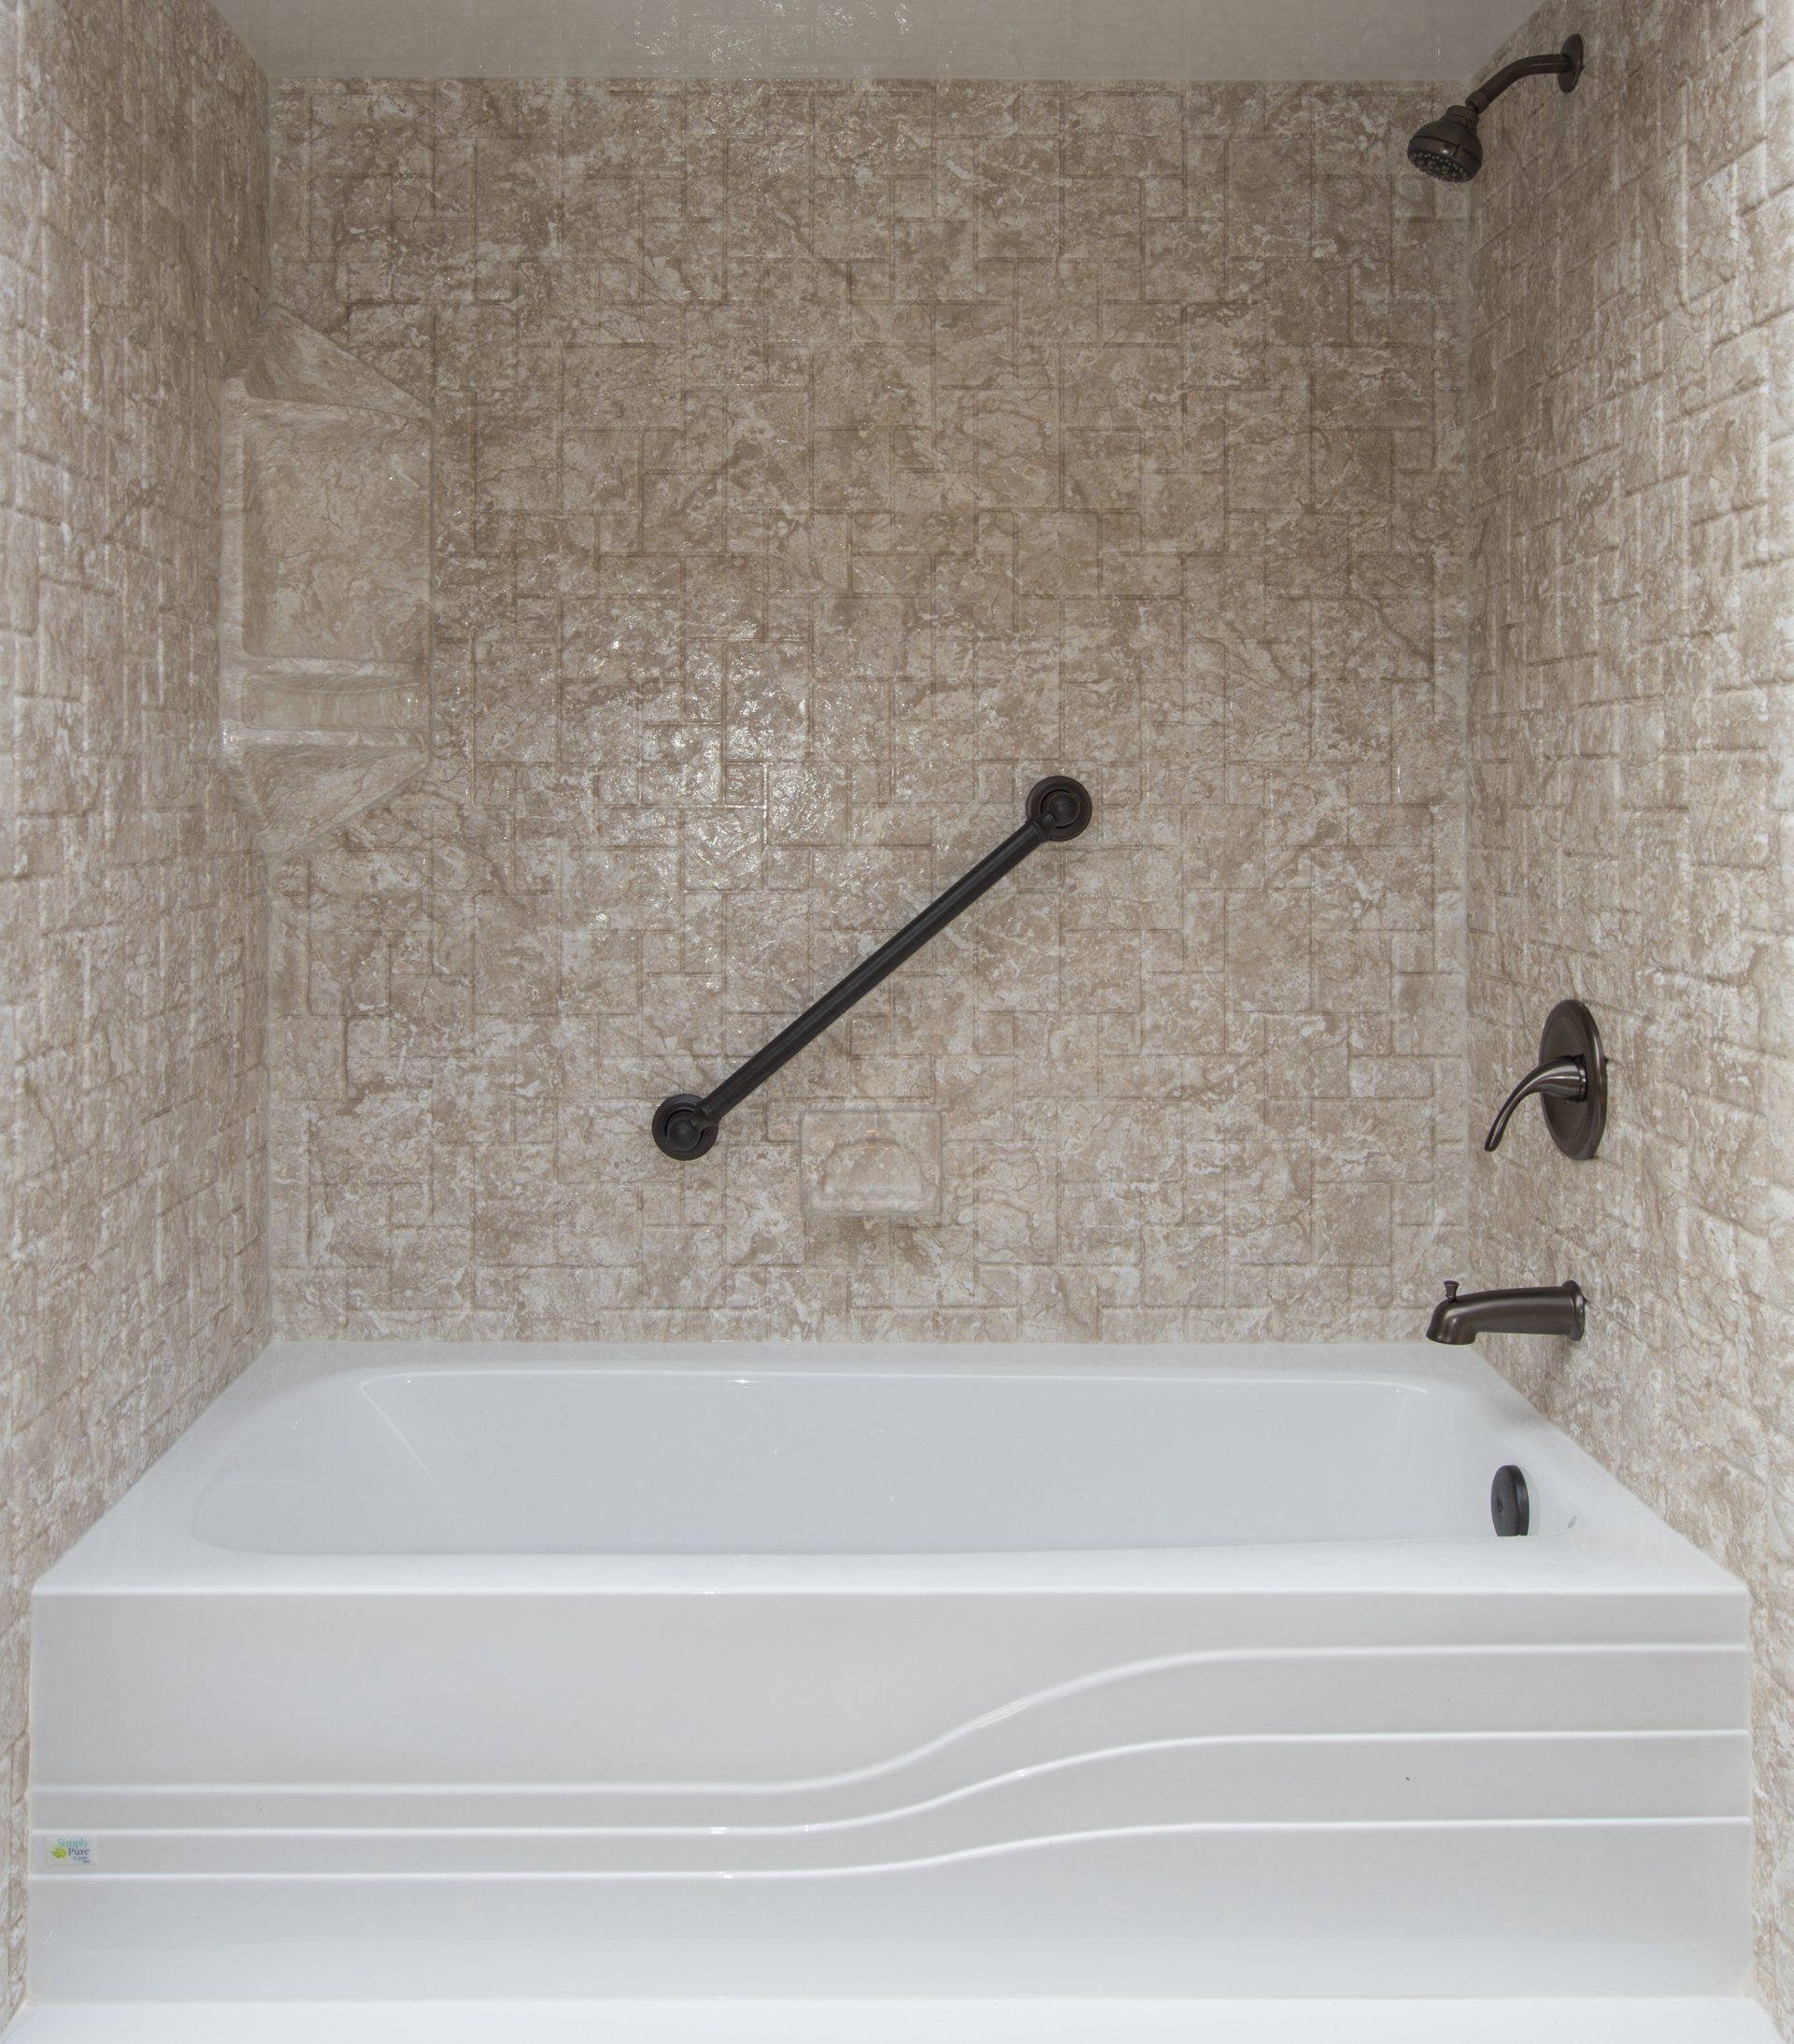
- Increased Safety: With slip-resistant floors and strategically placed grab bars, roll-in showers significantly reduce the risk of falls and injuries in the bathroom, a common concern especially for the elderly or those with reduced mobility.
- Enhanced Independence: Roll-in showers are engineered to provide users with the ability to enter and exit the shower area freely and independently. This autonomy is crucial for maintaining dignity and improving the quality of life for those who might otherwise require assistance.
- Versatile Design Options: Whether you're looking for a sleek, modern look or something more traditional, roll-in showers can be tailored to match your existing décor. With a variety of materials and finishes available, you can create a space that is both functional and stylish.
- Property Value: Adding a roll-in shower can also increase the resale value of your home. It's a feature that prospective buyers, particularly those conscious of accessibility and safety, will find appealing.
A Smart Investment for the Future
Choosing to install a roll-in shower isn't just about meeting immediate needs. It's an investment in your home and wellbeing. Whether you are planning for future mobility concerns, addressing current needs, or simply upgrading your bathroom for better functionality, a roll-in shower offers benefits that extend well beyond its immediate use.
Customizing Your Roll-in Shower for Maximum Comfort and Style
When you decide to install a roll-in shower, you’re not just choosing functionality; you’re also embracing the opportunity to enhance your bathroom with a design that perfectly fits your taste and needs. Here’s how you can customize your roll-in shower for both maximum comfort and style.
Choosing the Right Materials
The choice of materials for your roll-in shower is crucial not only for aesthetics but also for safety and durability. Here are some popular options:
- Non-Slip Tiles: Safety comes first in any bathroom design, especially in a roll-in shower. Opt for textured ceramic or porcelain tiles that offer good grip and are resistant to slippage.
- Glass Enclosures: For a sleek and modern look, consider installing glass shower doors. These not only make the bathroom feel larger but are also easier to clean and maintain. Ensure the glass is tempered for added safety.
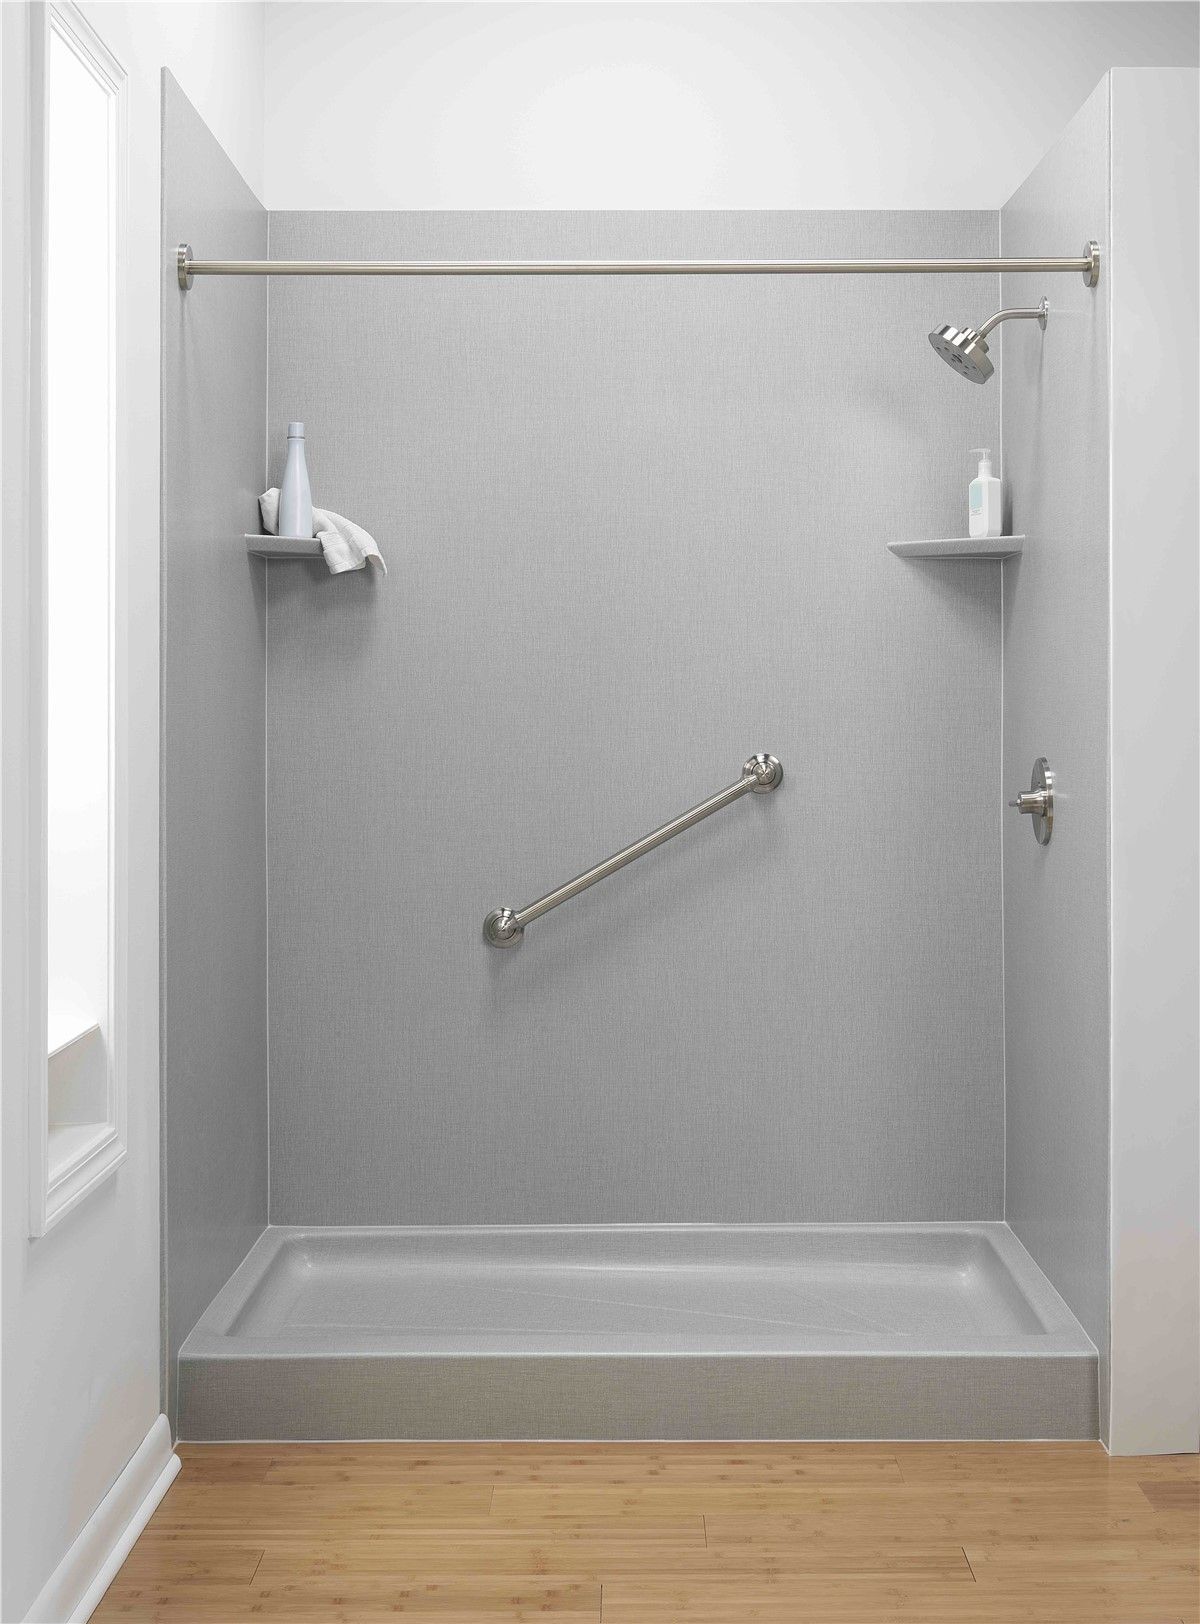
- Corian or Quartz Walls: These materials are not only beautiful and available in various colors but also mold and mildew resistant, making them ideal for wet environments like showers.
Incorporating Advanced Features
To truly make your roll-in shower stand out, consider adding advanced features that enhance both utility and luxury:
- Built-in Seating: A built-in bench or a fold-down seat is not only a necessity for many who use roll-in showers but also adds a touch of luxury to the bathing experience.
- Adjustable Shower Heads: Installing handheld or adjustable shower heads allows users of all heights and mobility levels to customize the water flow to suit their needs.
- Thermostatic Controls: These ensure the water temperature remains constant, preventing the risk of scalding—a crucial feature for those with sensitive skin or reduced sensation.
Lighting and Accessories
Good lighting is essential in any bathroom but is particularly important in a roll-in shower to ensure safety. Consider bright, LED lights that are energy-efficient and provide excellent visibility. Additionally, include accessories like integrated soap dishes, shelves, and grab bars that match the overall design aesthetic while enhancing functionality.
Personal Touches
Finally, add personal touches that reflect your style and enhance the sensory experience:
- Aromatherapy diffusers or waterproof Bluetooth speakers can turn a simple shower into a spa-like retreat.
- Colorful accents through tiles or backlit LED panels can add vibrancy or a calming ambiance depending on your choice.
By thoughtfully customizing your roll-in shower, you not only create a bathroom that’s safe and accessible but also a personal haven that reflects your unique style and caters to your comfort.
Navigating the Installation Process of Your Roll-in Shower
Installing a roll-in shower involves several critical steps to ensure everything functions safely and looks great. This part of our guide will walk you through the installation process, helping you understand what to expect and how to prepare.
Step 1: Planning and Design
Before any actual work begins, detailed planning and design are crucial. This involves:
- Measuring the Space: Accurately measure the bathroom to ensure the roll-in shower fits perfectly. Consider the space needed for a wheelchair to maneuver easily.
- Consulting with Professionals: Work with a bathroom design specialist or an architect familiar with ADA (Americans with Disabilities Act) guidelines to ensure all features meet accessibility standards.
- Selecting Materials and Features: Based on the designs discussed in Part 2, choose all your materials, fixtures, and features.
Step 2: Preparing for Installation
Preparation is key to a smooth installation process:
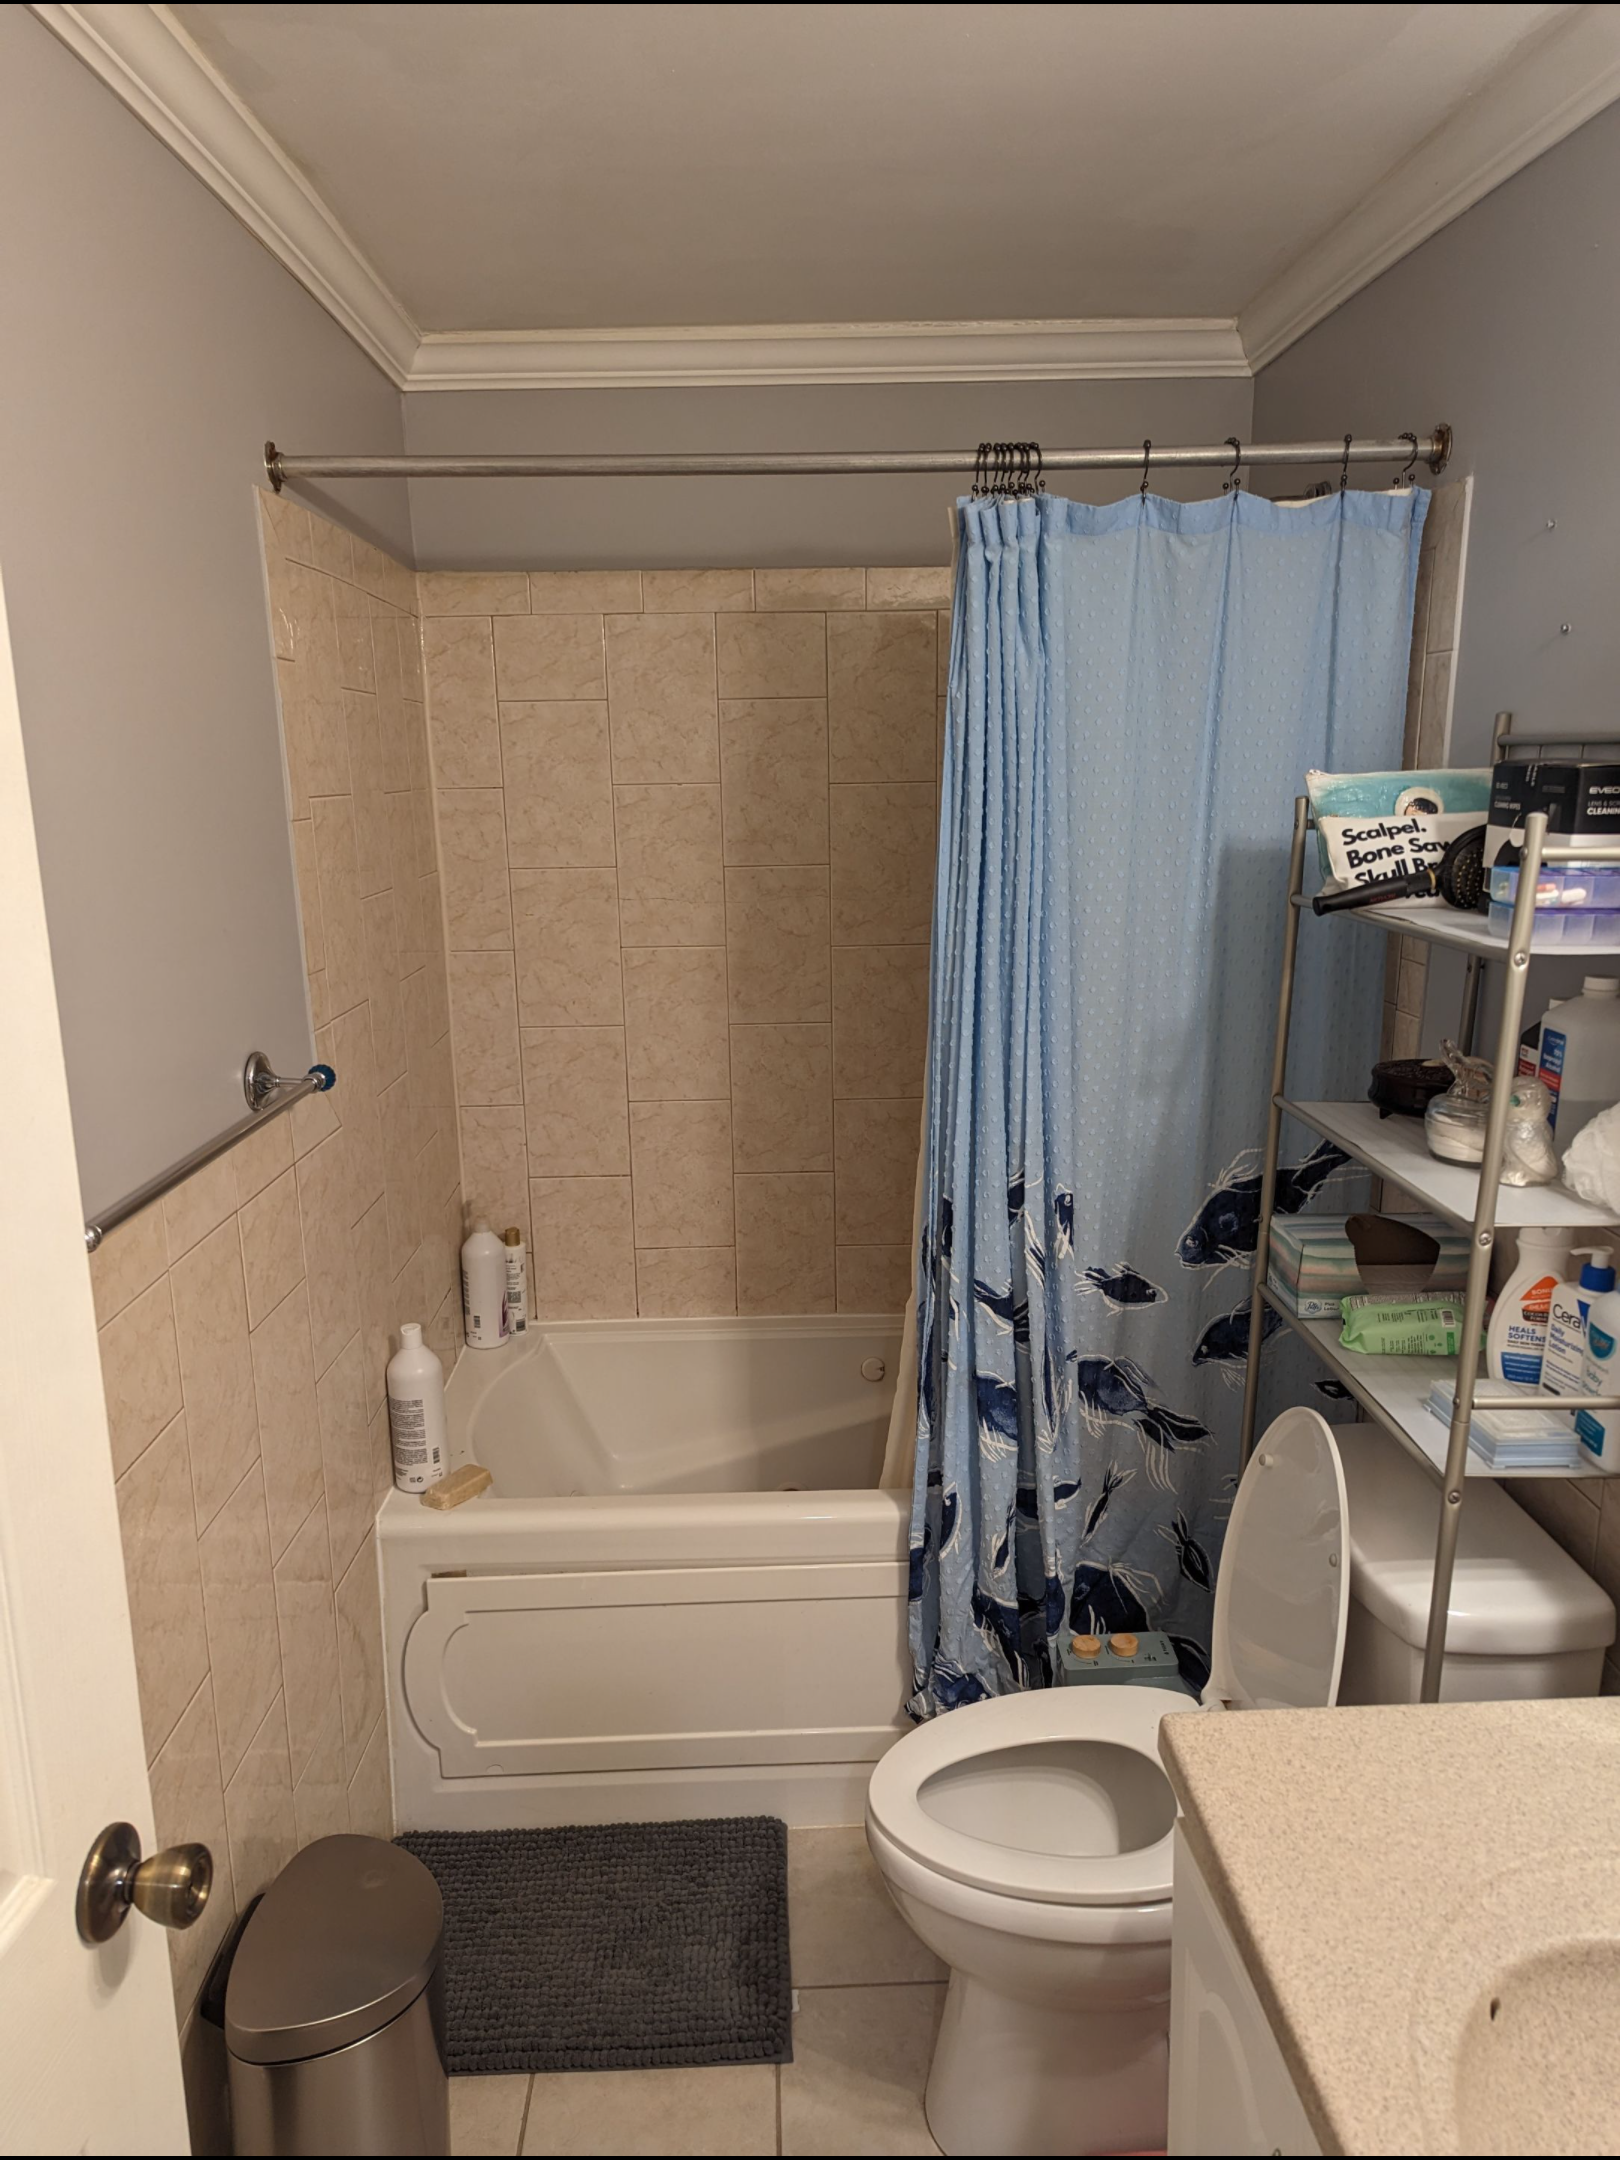
- Clearing the Bathroom: Remove any existing fixtures and fittings. This might include demolishing an old bathtub or shower stall.
- Addressing Plumbing: Ensure all plumbing is adapted for the new layout. This might involve rerouting pipes or installing new drain systems.
- Ensuring Waterproofing: Proper waterproofing is essential to prevent leaks and water damage, especially in a zero-threshold design where the bathroom floor and shower area are flush.
Step 3: The Installation
With everything planned and prepared, the installation can proceed:
- Building the Base: Construct a solid, level base for the shower, ensuring there are no thresholds.
- Installing Walls and Flooring: Apply your chosen materials for walls and flooring, making sure all surfaces are secure and waterproof.
- Fitting Fixtures: Install all plumbing fixtures, including the showerhead, controls, and any additional features like built-in seating or grab bars.
- Final Touches: Add the doors, lighting, and any decorative elements. Make sure all accessories are securely mounted and functional.
Step 4: Inspection and Testing
Once installation is complete:
- Inspect the Shower: Check all aspects of the shower to ensure everything is installed correctly and functions as expected.
- Water Testing: Run water through the shower to check for any leaks or drainage issues.
- Safety Audit: Perform a safety check to confirm that all features, such as grab bars and seating, are securely installed and the area is safe for use.
Preparing for Disruptions
It's important to prepare for some disruption during the installation process. Depending on the extent of work, the bathroom may be out of service for several days. Planning for an alternative bathing solution during this period can help minimize inconvenience.
With careful planning, skilled installation, and thorough testing, your new roll-in shower will provide a safe, stylish, and comfortable bathing experience.
Maintaining Your Roll-in Shower for Longevity and Performance
Once your roll-in shower is installed, maintaining it properly is key to ensuring it stays beautiful and functional for years to come. This part of our guide will provide you with practical tips on how to keep your roll-in shower in top condition.
Regular Cleaning
- Daily Rinsing: After each use, rinse the shower area with warm water. This helps prevent soap scum and mineral deposits from building up on the surfaces.
- Weekly Deep Cleaning: Use a mild, non-abrasive cleaner to scrub the shower floor, walls, and fixtures. Avoid harsh chemicals that can damage the finishes or create fumes that might be harmful.
- Spot Cleaning for Glass: If you have glass enclosures, use a squeegee after each use to remove water droplets. This prevents water spots and keeps the glass looking clear.
Inspecting and Replacing Fixtures
- Check Shower Heads and Faucets: Regularly inspect these for any signs of wear or leakage. Mineral buildup can clog shower heads, reducing water flow, so clean them periodically with a vinegar solution.
- Examine Seals and Caulking: Ensure that all seals and caulking around the shower are intact. Any cracks or gaps can lead to water leaks, so reapply caulk as necessary to maintain a watertight seal.
Managing Mold and Mildew
- Ventilation: Good ventilation is crucial in preventing mold and mildew growth. Use an exhaust fan during and after showers to help remove moisture from the air.
- Mold-resistant Products: Consider using mold-resistant shower curtains or paints, especially if your bathroom tends to retain moisture.
Safety Checks
- Grab Bars and Seating: Periodically check that all installed safety features, like grab bars and built-in seats, are secure and stable. Tighten any loose fittings immediately.
- Non-slip Surfaces: Ensure that the non-slip features of the floor are still effective. Replace any mats or apply new non-slip coatings as they wear down.
Addressing Hard Water
- Water Softeners: If you live in an area with hard water, consider installing a water softener to reduce lime and scale buildup in the plumbing.
- Vinegar Soaks for Fixtures: Soak shower heads and faucets in vinegar periodically to dissolve mineral deposits and maintain good water flow.
Professional Inspections
- Annual Check-ups: It’s a good idea to have a professional plumber inspect your shower and its plumbing annually. They can spot issues that might not be obvious but could cause problems down the line.
Maintaining your roll-in shower doesn’t have to be a chore. With regular care and attention, your shower will continue to provide a safe, relaxing, and functional space in your home. Stay tuned for Part 5, where we’ll wrap up with some final thoughts and additional tips to make the most out of your new roll-in shower.
Final Considerations and Enhancing Your Roll-in Shower Experience
Now that your roll-in shower is installed and you know how to maintain it effectively, let’s explore some final considerations and tips to enhance your shower experience, ensuring it remains a valuable and enjoyable part of your home.
Customizing for Personal Needs
- Adjustable Settings: Consider adding features that can be customized to different users’ needs, such as adjustable-height shower heads or thermostatic shower valves that precisely control water temperature.
- Personal Accessories: Equip your shower with accessories that make your bathing experience more enjoyable, such as waterproof seats with cushions for added comfort or integrated niches for toiletries.
Enhancing Accessibility
- Voice-Activated Controls: For those with mobility limitations, voice-activated systems can control water temperature, flow, and other functions, making the shower experience more accessible and independent.
- Barrier-Free Living: If you are considering further modifications to your home for accessibility, think about extending the principles of barrier-free design beyond the bathroom. Wide doorways, no-step entries, and accessible kitchens can contribute to a fully accessible home environment.
Eco-Friendly Practices
- Water Conservation: Install low-flow shower heads and faucets to reduce water usage without compromising pressure. This not only helps the environment but also lowers your water bills.
- Sustainable Materials: When updating or replacing parts of your shower, choose eco-friendly materials that are durable and have a lower environmental impact.
Emergency Preparedness
- Emergency Response: Install a waterproof emergency button or pull cord in the shower area that can be accessed easily in case of a fall or other emergencies.
- Regular Drills: Practice how to respond if someone needs help in the shower. This is especially important in households with elderly or physically challenged members.
Upgrading Over Time
- Future-Proofing: As technology advances, so do the options for home bathroom fixtures. Keep an eye on new innovations that can improve safety, comfort, and convenience in your roll-in shower.
- Seasonal Adjustments: Adapt your shower for different seasons. For instance, warmer tones and textures can make the bathroom feel cozier in the winter, while cooler, lighter accessories may be refreshing in the summer.
Celebrating Your New Space
- Sharing Your Experience: Consider sharing your roll-in shower experience online or with friends and family. Your insights could help others who are considering similar modifications.
- Enjoy the Benefits: Finally, take time to enjoy the comfort, independence, and safety your new roll-in shower brings to your life. It’s more than just a home improvement; it’s a lifestyle enhancement.
By considering these additional tips and continually adapting your space to meet your needs, you can maximize the enjoyment and functionality of your roll-in shower. It’s not just an investment in your property—it's an investment in your quality of life.
Blog