Maximizing Comfort and Style: The Ultimate Guide to Walk-In Shower Dimensions
Walk-In Shower Dimensions
Welcome to our comprehensive guide on walk-in shower dimensions, where we delve into everything you need to know to choose the perfect shower for your bathroom renovation. Whether you’re completely remodeling your bathroom or simply updating your shower space, understanding the various dimensions and options available is crucial. In this guide, we will explore standard walk-in shower sizes, tips for measuring your space, and design considerations to enhance your bathroom's functionality and aesthetic appeal.
Why Walk-In Shower Dimensions Matter
Choosing the right walk-in shower dimensions can transform a simple bathroom into a spa-like retreat. Walk-in showers offer accessibility and sleek design, making them a popular choice for modern bathrooms. However, selecting the right size is not just about fitting it into the available space; it’s about creating a comfortable, functional environment that aligns with your lifestyle needs.
Common Walk-In Shower Sizes
The size of your walk-in shower will depend largely on the size of your bathroom and your specific design preferences. Here’s a quick overview of the most commonly encountered dimensions:
- Small Walk-In Showers: Typically starting at 36” x 36”, these compact units are ideal for smaller bathrooms or as secondary showers in large bathrooms.
- Standard Walk-In Showers: The most popular dimension is around 60” x 30”, which offers ample space for comfortable movement and versatile design options.
- Large Walk-In Showers: For those who have the luxury of more space, options can extend to 60” x 42” and beyond, providing a grand bathing experience that can include multiple showerheads and seating.
Understanding these standard sizes can help you begin to visualize what will work best in your own space. In the next section, we'll dive deeper into how to measure your bathroom for a new walk-in shower and the implications of different dimensions on your overall bathroom layout.
Next, we'll break down the essentials of selecting the right walk-in shower dimensions, ensuring that your bathroom is not only functional but also a beautiful sanctuary in your home.
Measuring for Your Walk-In Shower
Now that you’re familiar with the common dimensions of walk-in showers, let’s talk about how to measure your bathroom to ensure that your new shower fits perfectly and enhances your space. Accurate measurement is key to a successful installation and can save you from costly mistakes or adjustments down the line.
Step-by-Step Guide to Measuring Your Bathroom Space
- Measure the Total Bathroom Area: Start by measuring the length and width of your entire bathroom. This gives you an overview of the total space and helps in planning the placement of your walk-in shower along with other fixtures.
- Identify the Shower Location: Decide where you want to place the shower. Common placements include corners or along one of the bathroom walls. Consider existing plumbing and how new plumbing will affect your bathroom layout.
- Determine Space for Movement: It's important to maintain sufficient space around the shower for ease of movement. A good rule of thumb is to have at least 30 inches of clear space in front of the shower entrance.
- Check for Obstructions: Note any windows, doors, or fixed installations like cabinets and toilets that might affect the placement and size of your walk-in shower. Adjust your plans to accommodate these fixtures comfortably.
Tips for Optimizing Shower Placement
- Visualize the Layout: Use painter’s tape to mark the dimensions of the shower on the floor. This visual aid helps you imagine the space it will occupy and how it interacts with other elements in the bathroom.
- Consider the Door Swing: Make sure that the shower door has enough room to open freely without hitting any other bathroom fixtures. Sliding doors or glass panels can be a smart option for tighter spaces.
- Think Vertically: Don’t forget to consider height when planning. If you’re opting for a walk-in without a door, ensure the shower walls are high enough to prevent splashing and maintain warmth inside.
By thoroughly measuring and planning the placement of your walk-in shower, you can maximize the functionality and style of your bathroom. In the next part of our guide, we will explore the design options and customizations available for walk-in showers, helping you to tailor your new shower to your personal taste and needs.
Design Options and Customization for Walk-In Showers
After determining the perfect size and placement for your walk-in shower, it's time to delve into the exciting world of design and customization. Walk-in showers offer a variety of design options that can be tailored to suit your personal style and functional requirements. Let’s explore some of the most popular features and choices that can make your walk-in shower both a personal retreat and a highlight in your home.
Customizable Design Features
- Shower Bases: Choose from a range of materials such as acrylic, fiberglass, or tiled. Each offers different aesthetics and maintenance levels. Consider a non-slip texture for safety, especially if accessibility is a concern.
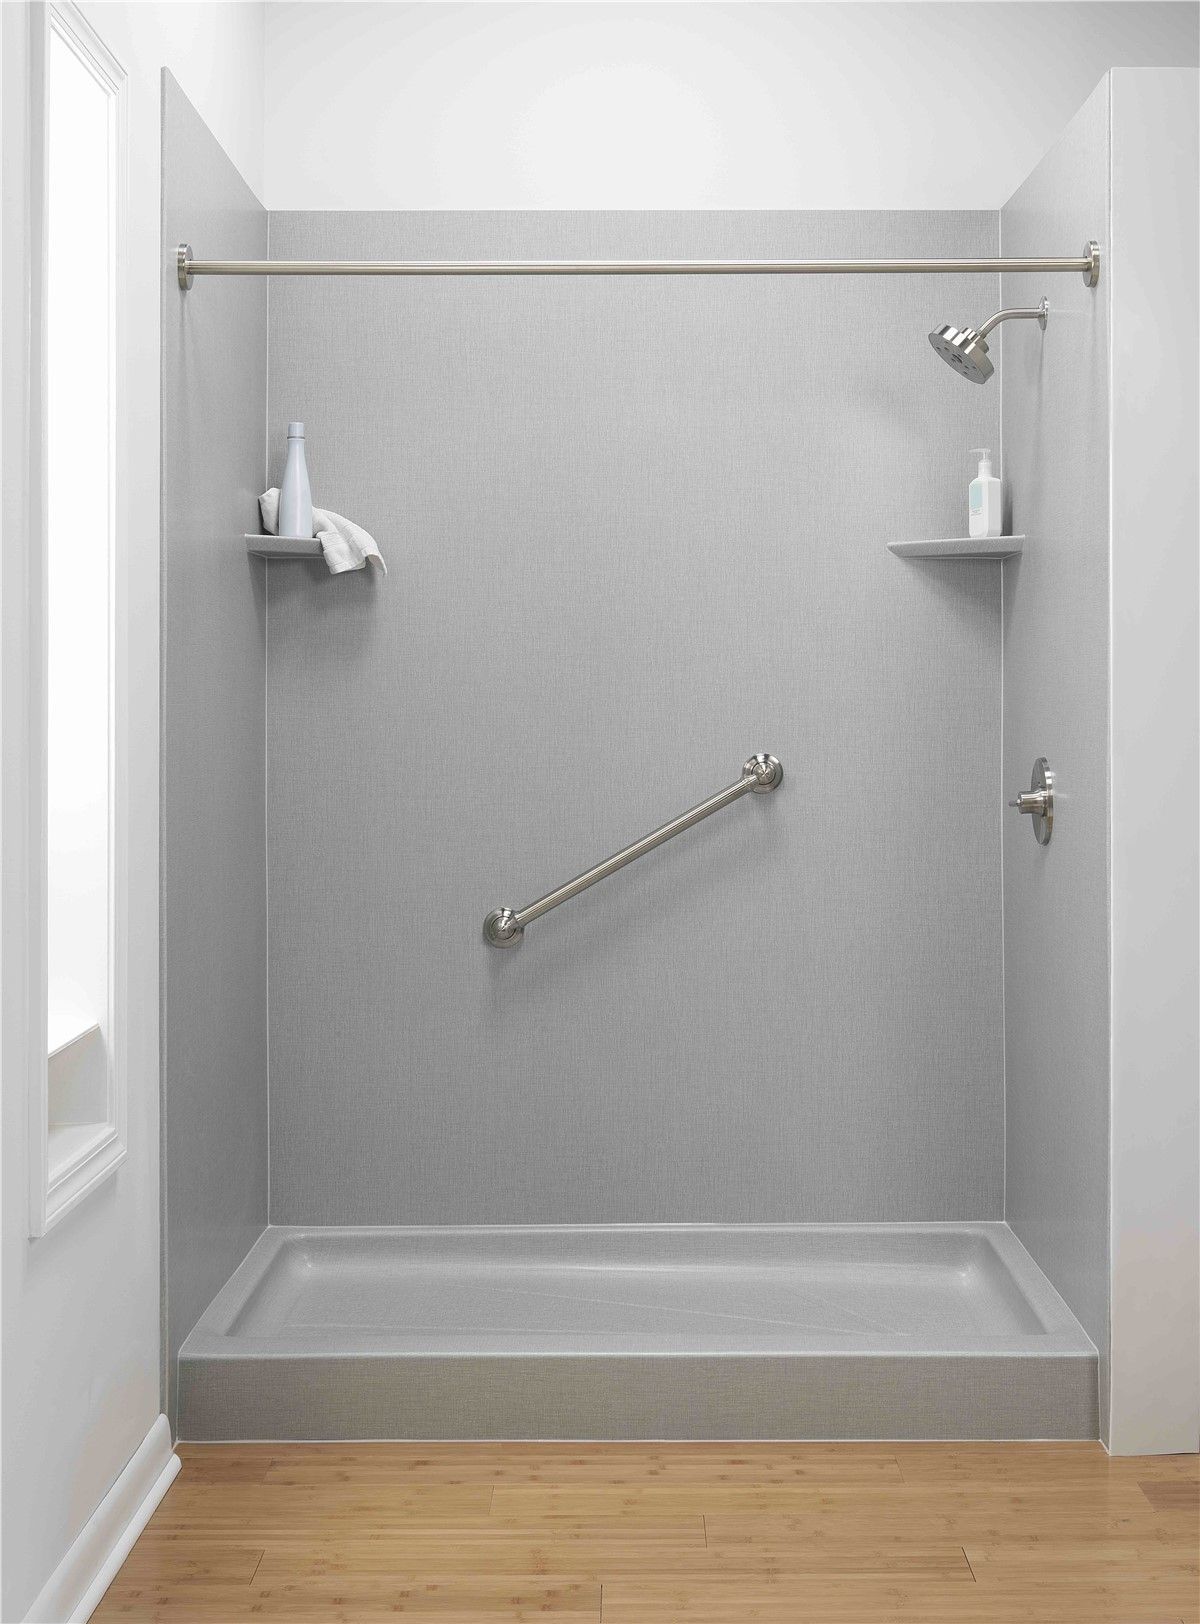
- Wall Materials: From sleek, seamless acrylic panels to luxurious ceramic or glass tiles, the materials you choose for the walls can drastically change the look and feel of your walk-in shower. Tiles offer endless color and pattern options but require more maintenance than panel systems.
- Glass Enclosures: Frameless glass enclosures are incredibly popular for creating a spacious, open look. Consider clear glass to showcase your tile work or frosted glass for more privacy. Glass thickness also plays a role in the sturdiness and quality of your shower.
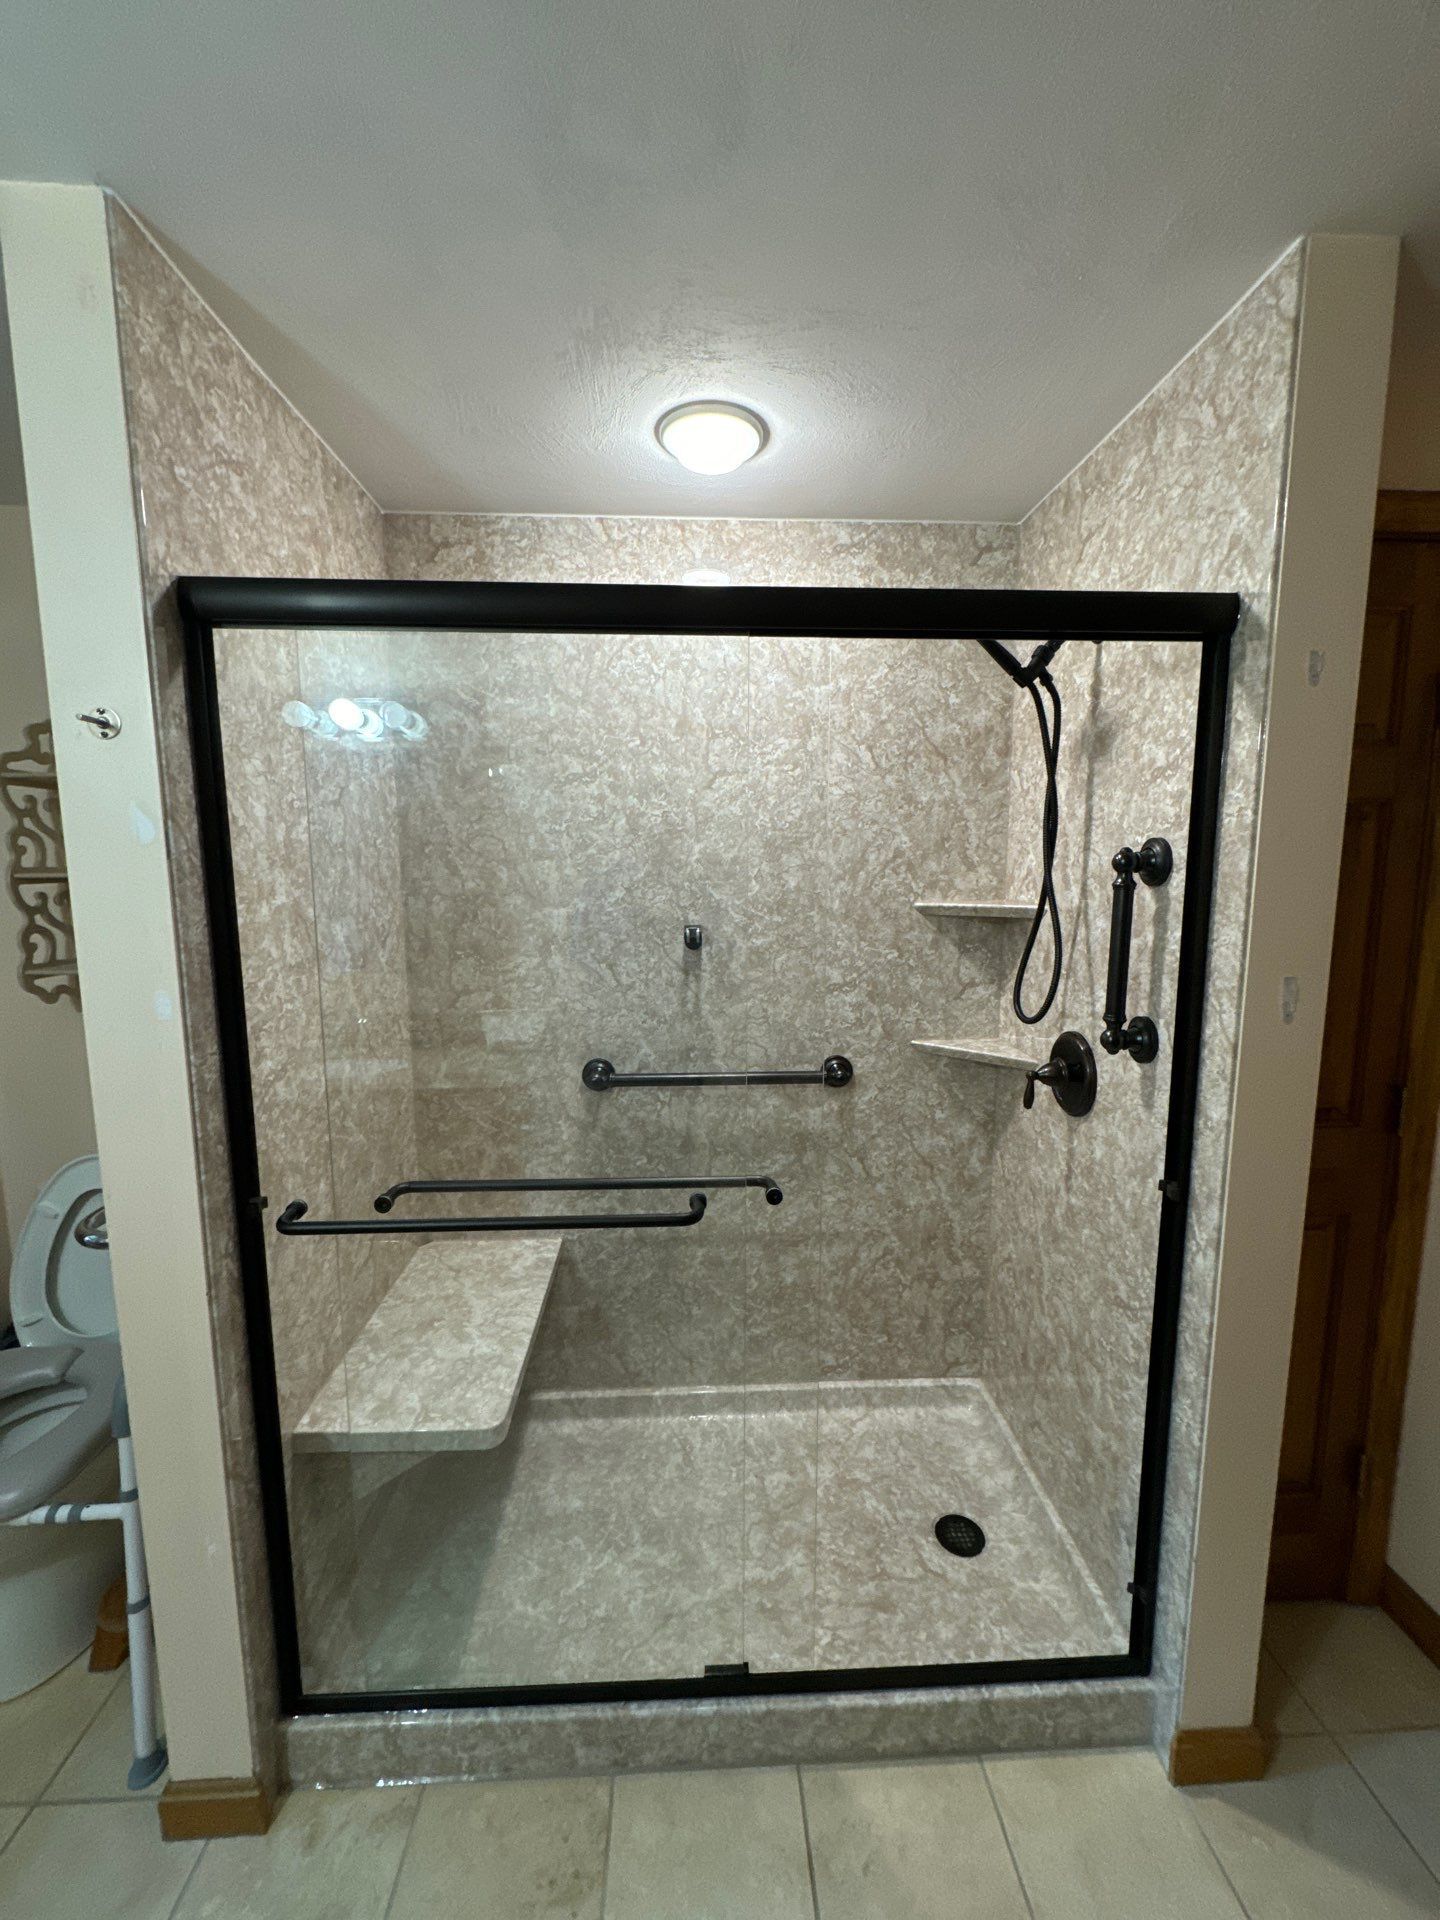
- Shower Benches: Adding a bench to your walk-in shower isn’t just a luxurious touch; it also enhances safety and functionality. Benches can be built-in or freestanding, depending on your shower’s design and size.
- Showerheads and Controls: Rainfall, handheld, body sprays, and waterfall showerheads are just some of the options available. Positioning these strategically can elevate your showering experience. Also, consider thermostatic controls for maintaining perfect water temperature throughout your shower.
Enhancing Functionality with Accessories
- Storage Solutions: Incorporate niches, shelves, or corner caddies to keep your toiletries organized and easily accessible. These can be designed to blend seamlessly with the rest of your shower.
- Lighting: Good lighting is essential in a shower. LED recessed lights are a popular choice for their moisture resistance and ability to provide bright, clear lighting.
- Safety Features: Grab bars and non-slip flooring are important for everyone, especially if you have limited mobility or are planning for aging in place. These features can be integrated stylishly to match your shower’s design.
Aesthetic Considerations
- Color Scheme: The colors you choose will affect the atmosphere of your bathroom. Lighter colors can make the space feel larger and more open, while darker hues can add a touch of drama and luxury.
- Tile Patterns and Sizes: Use larger tiles for a modern look with less grout to clean, or smaller tiles for more detailed designs and better grip on the floor.
- Detailing: Details like contrasting grout colors, decorative tiles, or a strip of accent tiling can make your walk-in shower stand out.
In our next part, we will discuss installation considerations and best practices to ensure your walk-in shower is not only beautiful but also built to last. With the right approach, your new shower will enhance your daily routine and add significant value to your home.
Installation Considerations for Walk-In Showers
Installing a walk-in shower involves careful planning and attention to detail to ensure everything is done correctly. This section will guide you through key considerations and best practices for installing your walk-in shower, ensuring a seamless fit and long-lasting performance.
Preparing for Installation
- Professional Assessment: Before beginning any work, it's crucial to have a professional evaluate your bathroom. This assessment should include plumbing, drainage, and structural integrity checks to identify any potential issues that could affect the installation.
- Waterproofing: Proper waterproofing is essential to prevent leaks and water damage. Ensure that the entire area around the shower is well-sealed, including floors, walls, and especially the joints and corners.
- Plumbing Requirements: Consider whether your existing plumbing setup is adequate for your new shower, especially if you're adding multiple showerheads or moving the location of the shower. Upgrades to your water lines or drain might be necessary to accommodate the new design.
Installation Best Practices
- Level and Secure Base: The shower base must be perfectly level to ensure proper drainage and prevent water pooling. Secure it firmly to avoid any movement, which could cause leaks.
- Tile Installation: If you choose tile for your shower walls or floor, ensure that it is correctly installed over a suitable backing board that's designed for wet areas. Use quality adhesive and grout to minimize moisture penetration.
- Glass Enclosure Fitting: Frameless glass enclosures require precise measurements and expert installation to ensure a perfect fit and prevent leaks. The glass should be tempered for safety and durability.
- Ventilation: Good ventilation is crucial in a bathroom to prevent mold and mildew. Ensure there is an adequate ventilation system in place, such as an exhaust fan, which should be used during and after showers to keep the area dry.
Common Installation Pitfalls to Avoid
- Ignoring Manufacturer’s Instructions: Always follow the manufacturer’s guidelines for installation to ensure warranty coverage and optimal performance of the shower components.
- Skimping on Materials: Use high-quality materials, especially for crucial aspects like waterproofing and sealants. Opting for cheaper options can lead to issues down the line and increase the likelihood of repairs.
- Rushing the Process: Take your time with the installation to ensure everything is done correctly. Rushing can lead to mistakes that are costly and time-consuming to rectify.
By adhering to these considerations and best practices, you can ensure that your walk-in shower installation goes smoothly and results in a durable, leak-free addition to your bathroom. Lastly, we'll explore maintenance tips to keep your walk-in shower looking and functioning at its best for years to come. Stay tuned for these essential upkeep strategies!
Maintaining Your Walk-In Shower for Longevity and Performance
Congratulations on installing your new walk-in shower! Now that you have a beautiful and functional shower space, maintaining it properly is key to ensuring it stays in top condition. In this final part of our guide, we'll cover essential maintenance tips and best practices to keep your walk-in shower looking pristine and operating flawlessly.
Routine Cleaning Tips
- Daily Practices: After each use, it's beneficial to squeegee the walls and glass to prevent water spots and reduce the buildup of soap scum. This simple step can significantly extend the time between deep cleanings.
- Weekly Cleaning: Use a mild, non-abrasive cleaner specifically designed for bathrooms to clean all surfaces of your walk-in shower weekly. Avoid harsh chemicals that can damage tile grout and the finish on fixtures.
- Grout and Sealant Checks: Regularly inspect the grout and sealant in your shower for any signs of wear or damage. Promptly repair any areas where the grout is crumbling or the sealant is peeling to prevent water from seeping behind tiles and causing damage.
Preventing Mold and Mildew
- Ventilation: Always use your bathroom's ventilation system during and after showers to help reduce moisture in the air, which is a primary cause of mold and mildew. Consider leaving the bathroom door open after use if humidity levels remain high.
- Deep Clean Mold-Prone Areas: Pay extra attention to corners and crevices where mold is most likely to grow. Use a cleaning solution that includes mold inhibitors and consider a periodic application of a mold-preventive product.
- Dry Out: Encourage complete drying of the shower area by leaving the shower door or curtain open after use. This increases air circulation and reduces moisture.
Care for Shower Components
- Showerheads and Fixtures: Lime scale can build up on showerheads and fixtures, affecting their performance and appearance. Regularly descale them using vinegar or a lime scale remover. This not only keeps them looking good but also ensures they operate efficiently.
- Door Tracks and Seals: Clean any tracks or seals on shower doors as these can collect grime and hair, leading to poor operation and leaks. A small brush can be effective for getting into these tight spaces.
- Hardware and Accessories: Check any movable parts, such as door handles, hinges, and support bars, for tightness and correct operation. Lubricate if necessary and tighten any loose screws.
By following these maintenance tips, you can enjoy your walk-in shower for many years without significant issues. Regular care not only preserves the shower's appearance and functionality but also helps to safeguard your investment in your home’s value and your own comfort. Thank you for following our guide on walk-in shower dimensions and installation. Enjoy your new, dream bathroom to the fullest!
Blog